Admin Tips

This page has links to a series of articles for Freedica website administrators explaining how to install your own Freedica Network, how to configure and customize your network and how to maintain your network over time.

Setting up a Freedica network is a matter of carefully following a series of simple steps. If you want to start and run a secure social network, you need at least one secure Linux computer you can use to go online and make changes and additions to your network website and to hold your network data and documents. You also need a secure Linux Virtual Private Server to host your network website.

These steps are divided into the following 8 articles:

A1 Create a Secure Linux Computer
A2 First Steps after creating a Debian Laptop
A3 Create your Own Secure VPS
A4 Install the Hestia Control Panel on your VPS
A5 Use Hestia to Install Freedica
A6 Network Admin Configuration
A7 Customize your Network Appearance
A8 Member Moderation

Admin 8 Member Moderation

One of the most important features of Freedica is its Member Moderation system – which allows you as the network administrator to control who is allowed to join your social network. This system allows you to protect your members from harassment from bots and trolls so common on top-down social networks. In this article, we will explain how to use the Member Moderation system.

Member Moderation
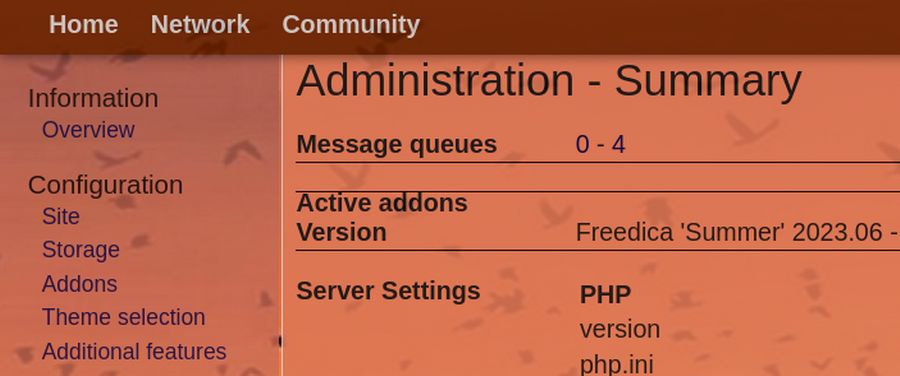
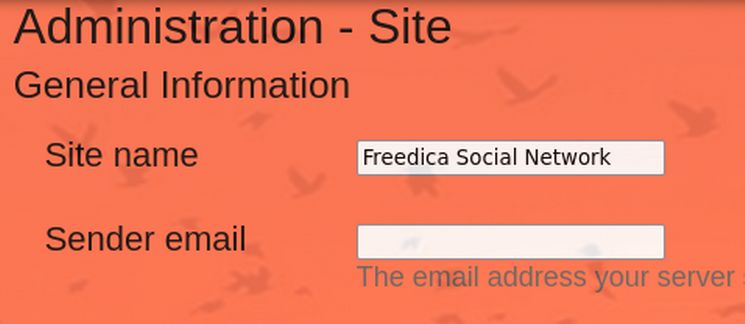
In our previous article, we went to Admin, Site, General Information, Registration to change the registration system from Open to Requires approval. In addition, there is a box where you can customize the information at the top of your registration form explaining to new members what your network policies are for accepting new members. For example, you might only accept application from your own state. Or you may require new members to state an interest in a particular goal such as improving the economy. Here is what these Registration settings look like when you are logged in as the Network Administrator:

01

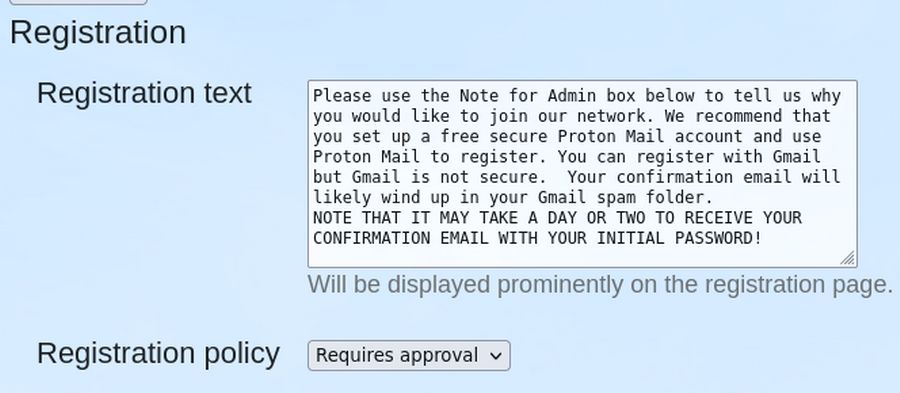
Change the text to match the needs and interests of your group. Then log out and view your Network Home page.

New Member Registration
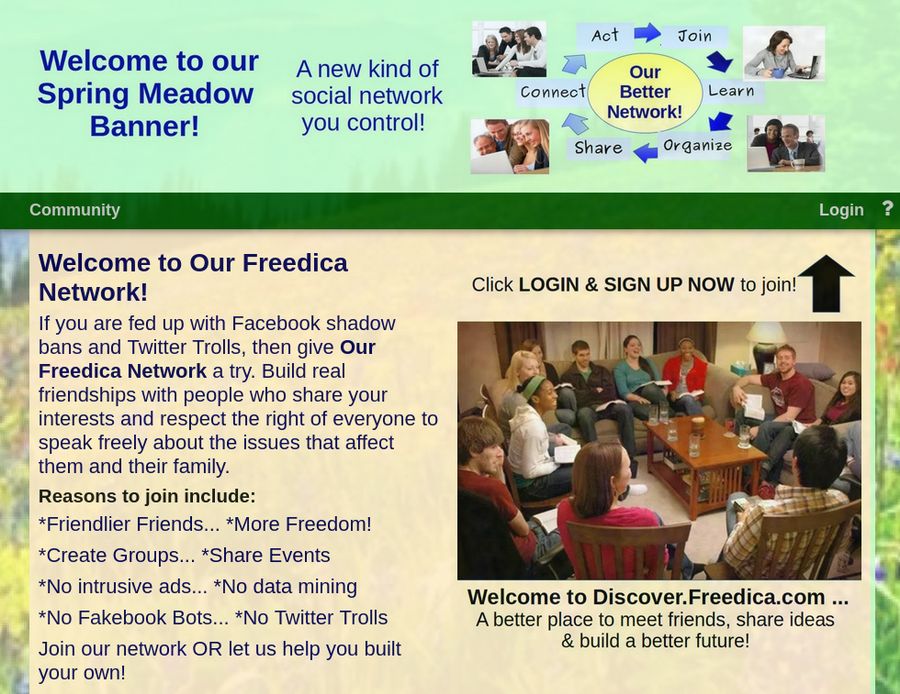
One of the first challenges new members face is figuring out how to register. To help them get to the registration page, we provide two important clues. First, at the bottom of the text on the left side, it says to click LOGIN or click HERE to join!

02

Click on the word HERE to verify that this link goes directly to the Registration page. Then click on Home to go back to the Network Home page. Because many visual learners do not actually read text, the second important clue is just above the Welcome image:

Admin 7 Customize your network appearance

One of our goals is to make it easy for you to create your own theme styles. In this article, we will first explain how to modify an existing them and then review the process for creating a new theme style called Freedom which we will add as a new sixth style to our spring theme (along with freedica, meadow, sky, mist and sun).

Modify an Existing Theme
In our last article, we set the Meadow style for the Site pages and the Sky style for the Member pages. But there is a problem. The banner for our Site Home page reads: “Welcome to our Spring Meadow Banner” Also the Text on our Home page reads “Welcome to our Freedica Network and has a brown background rather than a green background:

01

Here, we will review how to change the banner and text to match the name of your network. We will then explain how to create your own theme using your own colors, text and background images.

Step 1 Change the Home page Title, Text and Color
Freedica includes five HTML files that make it easy to customize the home page. Log into your Hestia Control Panel and click on the User account. Then click Files, Web, your network domain, public_html. Rename the home.html as freedica-home.html. Then rename meadow-home.html as home.html.

Admin 6 Network Configuration Steps

In our last article, we used the initial password to log into our Freedica network as the network administrator. We then added our Profile image. In this article, we will review some important initial configuration steps. Each of these steps only needs to be done once.

Step 1 Change your Admin password
Click on your image in the upper right corner to bring up the hidden Member menu.

01

Then click Settings.

02

Click Password Change. Type in your new password twice and your initial password once. Then click Save Settings. The Password Changed popup should appear.

Step 2 Review the initial queue information
Click Main Menu, Admin to go to your Freedica Admin screen.

03

The first number shown is the Retry queue – which will be retried. The second number shown is the Task queue which are tasks queued for the next background worker run.

Step 3 Change the Site Name and add site email
From the hidden menu, click on Admin, Site, General Information.

04

Change the site name from Freedica Social Network to Our Better Network. Then enter your network admin email address for the Sender email. In the boxes called Shortcut icon and Touch icon, type images/favicon.ico.

05

Then scroll down to just above the word Register and click Save Settings. This will now display a heart and your network name in the browser tab.

Step 4 Change the Site Style
Freedica has two types of pages. Some pages are Site pages which can only be altered by the network administrator. These pages include the Home Welcome page, the login page, the registration page and the pages reached by clicking on Admin in the main menu.

Member controlled pages include their Profile Home page, their Network page and their Community Page.

Freedica comes with several styles including the default Freedica styles and also four nature based styles called Sky, Sun, Mist and Meadow. To change the appearance of the Site pages, scroll up to System theme and click Change default theme settings. Just above the word Readme, click Submit. This will confirm the Freedica style. Then scroll up to Set Style and change the style to Mist and click Submit. Then click Network to see what the Mist style looks like.

Admin 5 Use Hestia to Install Freedica

It is really amazing that we now have the ability to create our own version of Facebook or Twitter with just the click of a few buttons. Setting up your own Freedica social network will give your group the security, freedom and privacy that simply does not exist on any platform controlled by billionaires.

How to Install Freedica with Hestia
One of our goals is to make installing a secure social network as easy as possible. In this article, we provide a way to install Freedica using our Hestia Control Panel which has been installed on a Debian virtual private server hosted by Canhost.ca.

01

Here is a summary of the steps to create your own secure social network:

02

Step 1 Start with a Secure Computer
Most people use a Windows computer to go online. Sadly, the Windows operating system is extremely insecure and easy to hack – subjecting you and your social network to the risk of Windows Ransomware. The sad fact is that all Windows computers have hidden back doors that are easily compromised by hackers looking to take over your social network. By contrast, a Linux Debian computer is extremely secure with no hidden back doors.

03

In 2022, Windows suffered from 863 security flaws, many of which allows hackers to remotely take control of your computer – gaining access to all of your website passwords and thus allowing them to take over your social network.

To be clear, folks creating “member” accounts and using the Freedica Network with a Windows computer would not place the entire network at risk. They would only be placing their personal member account at risk. But is it essential that the person creating and administering the Freedica network only log into the back end of the network with a Linux computer. The good news is that most people have an older Windows computer in their closet. These can easily be converted into a secure Linux computer. We covered the process of converting a an older Windows computer to Linux Debian in this article:
https://createabetternetwork.com/2-create-a-secure-foundation/2-1-create-a-secure-linux-computer

Admin 4 Use Midnight Commander to Change VPS Settings

One of the biggest challenges of working with a virtual server is that it does not come with a desktop environment. Rather than clicking buttons, you need to enter commands in a terminal. The problem with the terminal is that, it can be very difficult for visual learners (who make up half the population) to be constantly entering a series of complex commands into an abstract tool like the terminal. Thankfully, the Linux community also provides a graphical user interface for a server File Manager called Midnight Commander. In this article, we will learn how to use Midnight Commander to change some important settings on our Debian VPS.

Install Midnight Commander
In a previous article, we installed Midnight Commander on our server with this command: sudo apt-get install mc

Once Midnight Commander is installed, you can open it by starting and SSH session and then type mc. Then press Enter. Here is the initial interface when opening Midnight Commander on a server:

01

On a server, you may need to navigate with the up and down arrows and select folders by pressing Enter on your keyboard. You can gain more function by using SSH to access the server from your home computer. Midnight Commander uses a double panel screen. The purpose of this double panel arrangement is to make it easy to copy files from one panel and paste them into the other panel. The panels are labeled Left and Right. Above the panels are a menu that applies to both panels with the menu items called File, Command and Options. Each menu item has a series of sub-menu items, some of which we will cover in this tutorial.