
In our last article, we used the initial password to log into our Freedica network as the network administrator. We then added our Profile image. In this article, we will review some important initial configuration steps. Each of these steps only needs to be done once.
Step 1 Change your Admin password
Click on your image in the upper right corner to bring up the hidden Member menu.
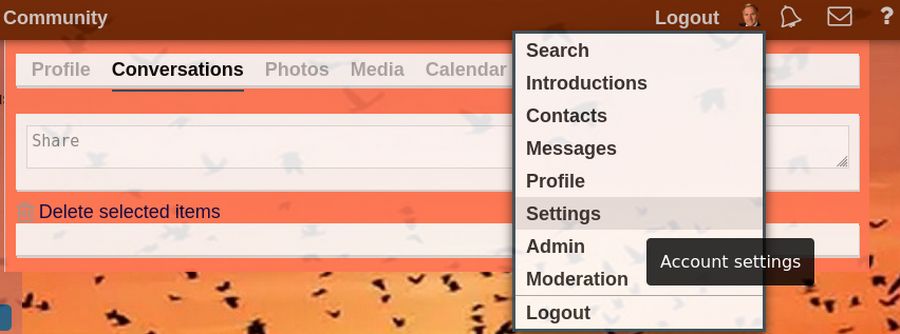
Then click Settings.
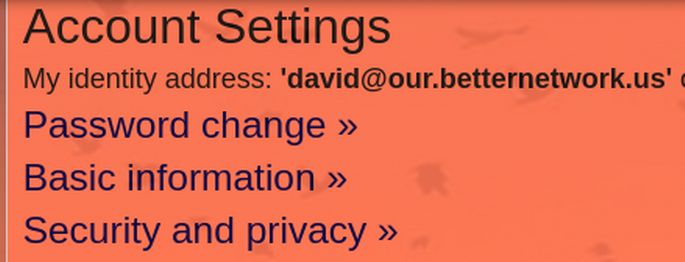
Click Password Change. Type in your new password twice and your initial password once. Then click Save Settings. The Password Changed popup should appear.
Step 2 Review the initial queue information
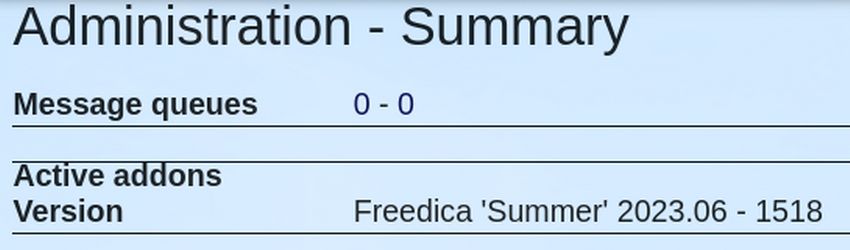
Click Main Menu, Admin to go to your Freedica Admin screen.
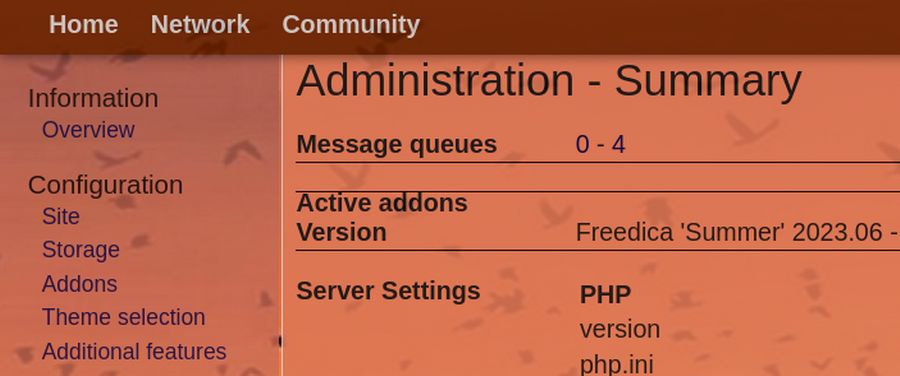
The first number shown is the Retry queue – which will be retried. The second number shown is the Task queue which are tasks queued for the next background worker run.
Step 3 Change the Site Name and add site email
From the hidden menu, click on Admin, Site, General Information.
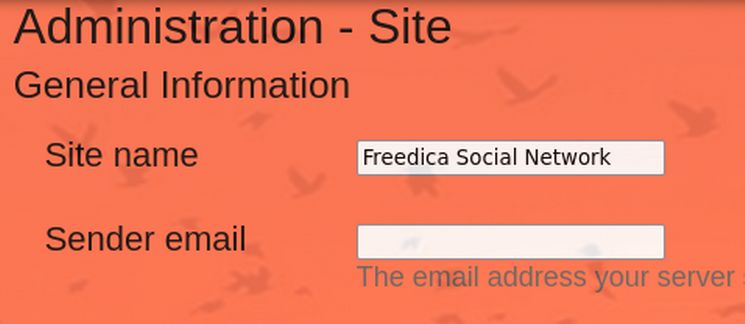
Change the site name from Freedica Social Network to Our Better Network. Then enter your network admin email address for the Sender email. In the boxes called Shortcut icon and Touch icon, type images/favicon.ico.
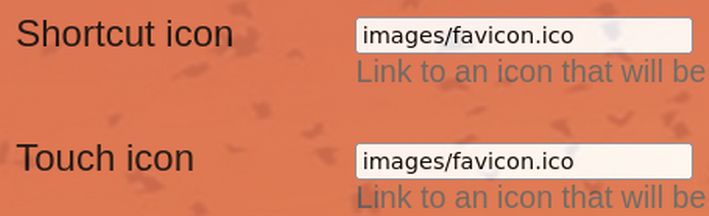
Then scroll down to just above the word Register and click Save Settings. This will now display a heart and your network name in the browser tab.
Step 4 Change the Site Style
Freedica has two types of pages. Some pages are Site pages which can only be altered by the network administrator. These pages include the Home Welcome page, the login page, the registration page and the pages reached by clicking on Admin in the main menu.
Member controlled pages include their Profile Home page, their Network page and their Community Page.
Freedica comes with several styles including the default Freedica styles and also four nature based styles called Sky, Sun, Mist and Meadow. To change the appearance of the Site pages, scroll up to System theme and click Change default theme settings. Just above the word Readme, click Submit. This will confirm the Freedica style. Then scroll up to Set Style and change the style to Mist and click Submit. Then click Network to see what the Mist style looks like.
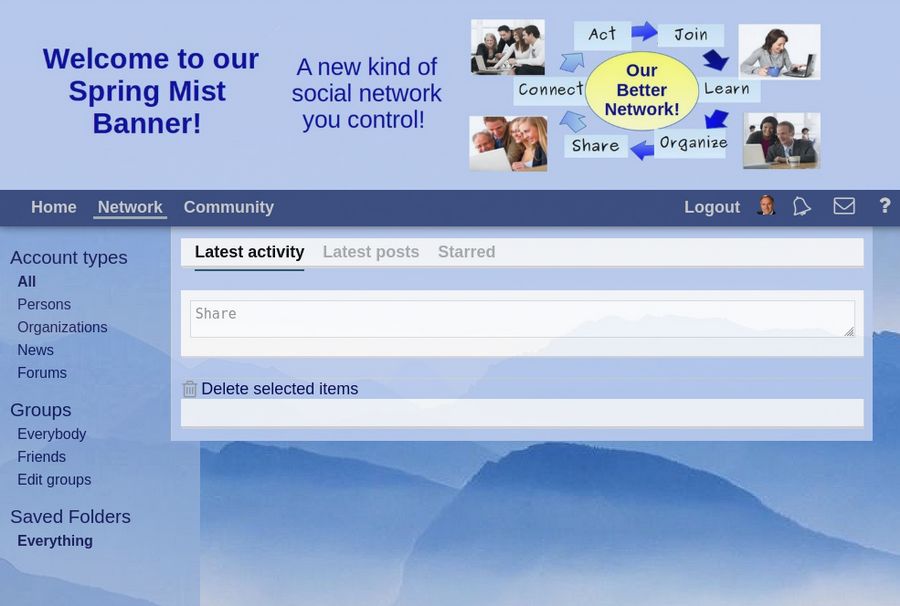
Then click the browser back arrow and change the theme to sun and click Submit:
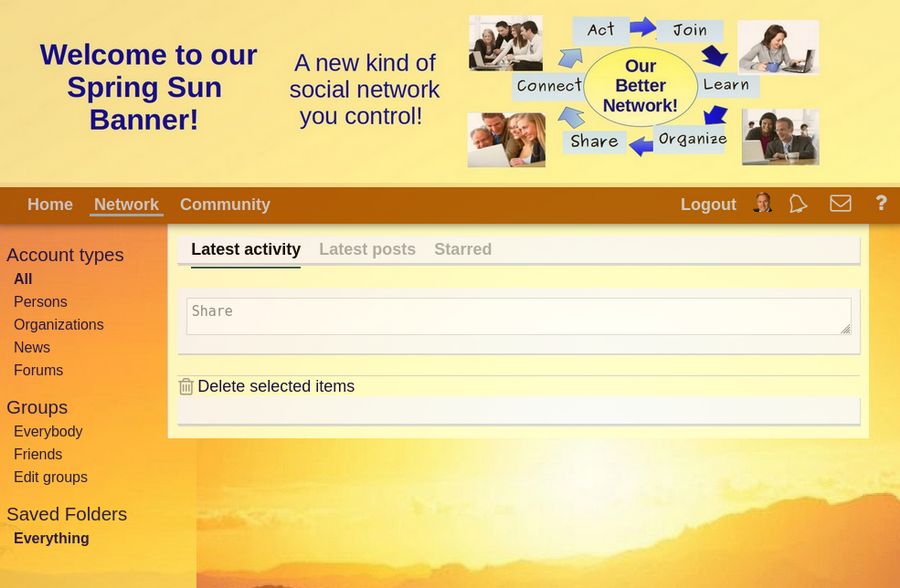
Then click the back arrow and click Meadow then submit:
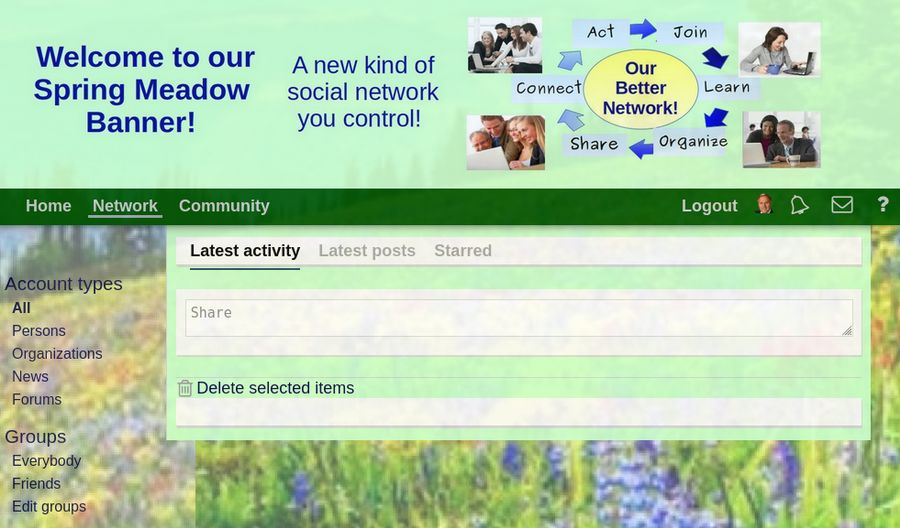
Then click the back arrow and click Sky then submit:

Later we will explain how to customize each of these styles as well as how to make your own custom styles. Note that you as the site administrator can change the theme banner and background image to whatever you want by changing the files in the Hestia File Manager. However, members can only choose from the styles you have already created. For now, click the Meadow style which we will use for the Site style. Then click Submit
Step 5 Change the Registration policy from Open to Requires approval
By default, the Registration policy must be set to open as this is the only way to register the first administrator. But to reduce bots and trolls signing up for your network, you should go to Admin, Site and scroll down to Registration. You can change the registration text to whatever you want. Scroll down to the Registration settings and change the registration policy to Requires approval. This will force new members to give you a reason they want to join. You can then decide if you want them to join. Equally important, because bots and trolls are less likely to provide any reason, this requirement will make it easier to keep them off your network.
Then scroll down and click Save Settings. Then scroll to the bottom of Site Settings and check Enable Fast Lane. Then click Save Settings.
Step 6 Add an Error Log Table
Click Logs in the left side admin menu. Note that Log file says log/freedica.log.
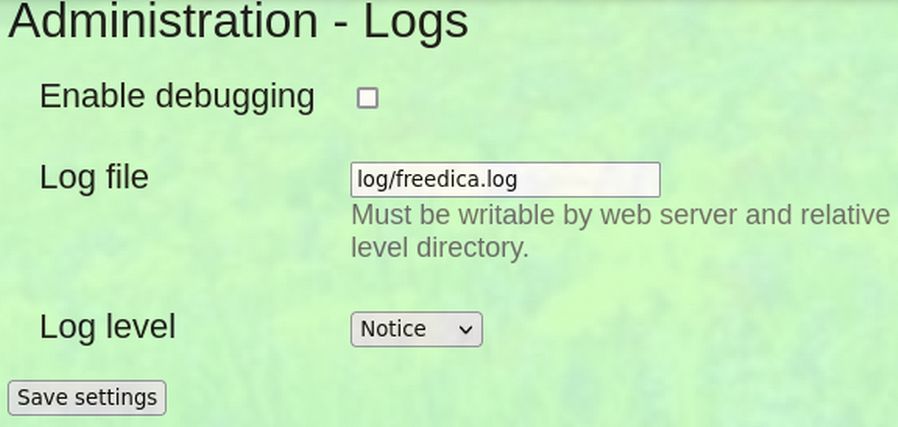
Check Enable debugging. Then click Save Settings. Then click View Logs in the left admin menu. There will be an error message that reads: “Error trying to open log/freedica.log log file. Check to see if file log/freedica.log exist and is readable.”
In plain English, the error message is telling us to log into our Hestia User panel, click Files. Then click web, our network name, public_html. Then click New to create a new folder called log. Then open the log folder and click New to create a file called freedica.log.
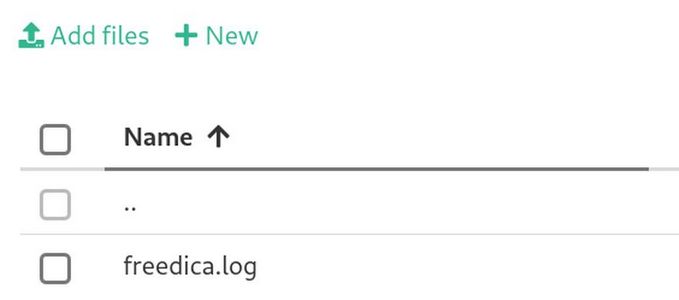
Then go back to your friendica website and reload the View Logs page.
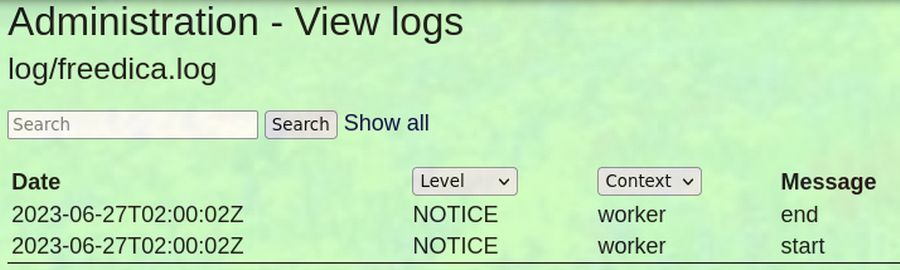
The good news is that we do not currently have any errors. But if you do make some changes, this file can help you determine if your changes caused any errors and even give you the file and line number of the error that needs to be fixed. For now, go back to the Logs page, uncheck Debugging and click Save Settings.
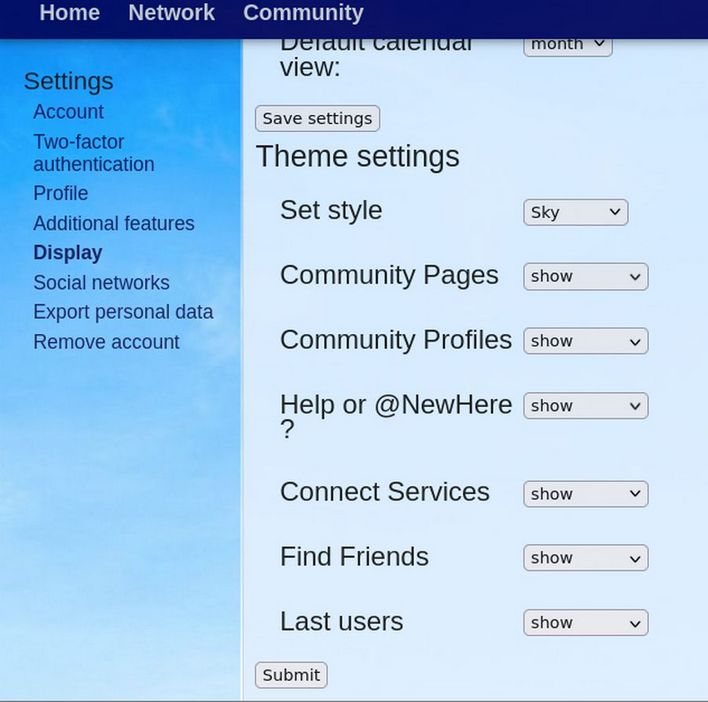
Step 7 Change the Style for your Member Pages
Each member can customize their member pages by choosing one of the nature styles. To see how this is done, from the main menu, click Settings. Then in the left side menu, click Display:
Scroll down and click Save settings to confirm the Spring theme. Then click Submit to confirm the Meadow style. Then change the style from Meadow to Sky and click Submit.
Step 8 Create a Welcome Pinned Post
Click Network. Then click Share which opens this popup:
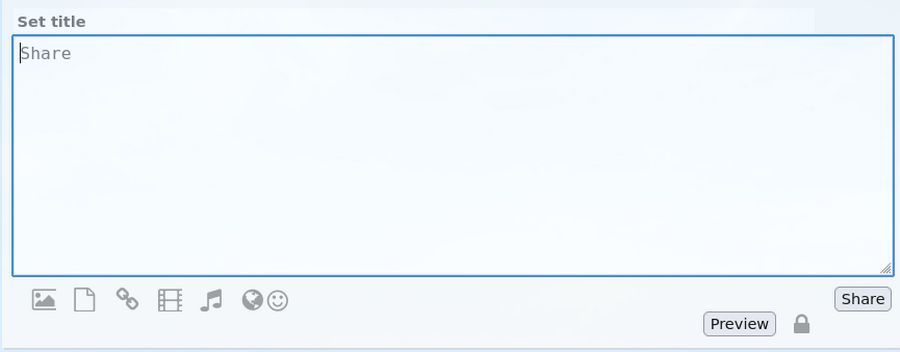
For Set title, type Welcome to our Network!
In the Share box, type:
Our.BetterNetwork.us is an educational social network associated with our course called Create a Better Network at College in the Clouds dot org. While registration is open all, registration requests are manually reviewed before acceptance. Our hope is that you will use this social network to ask questions and share advice in a respectful manner – recognizing that openly and politely stating differences is the best way to solve problems.
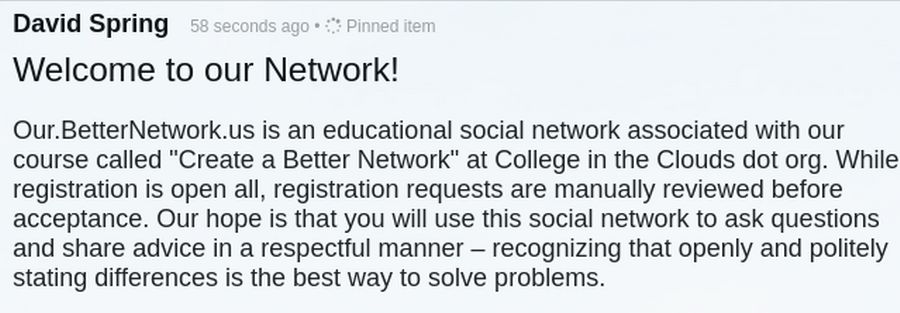
This Welcome post is an example of a pinned post. A pinned post will stay at the top of your personal Home page putting all other posts in chronological order below it. First create and share the post. Then click on the circle icon which reveals the word Pin. Then refresh the page to see the words “Pinned Item” placed above the title of the post.
Then click Share. Then click on the circle icon which reveals the word Pin. Then refresh the page to see the words “Pinned Item” placed above the title of the post.
Then click on the Community page to see how the community will view your post:
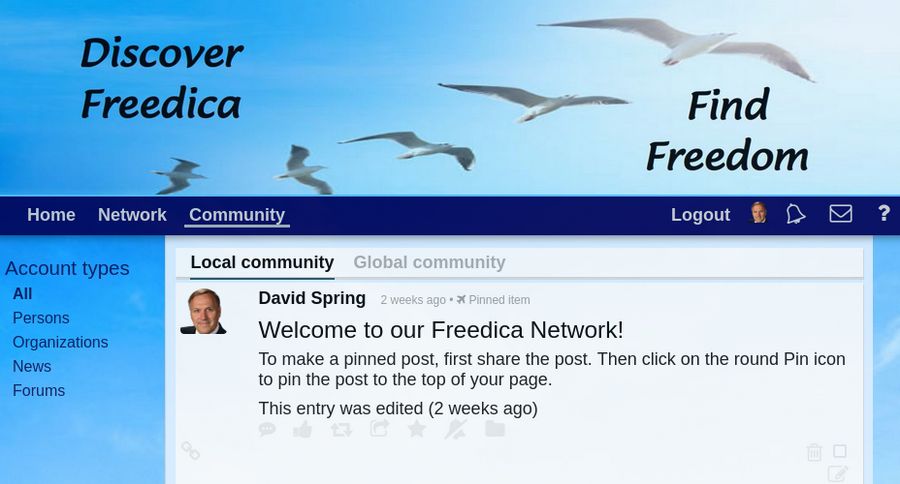
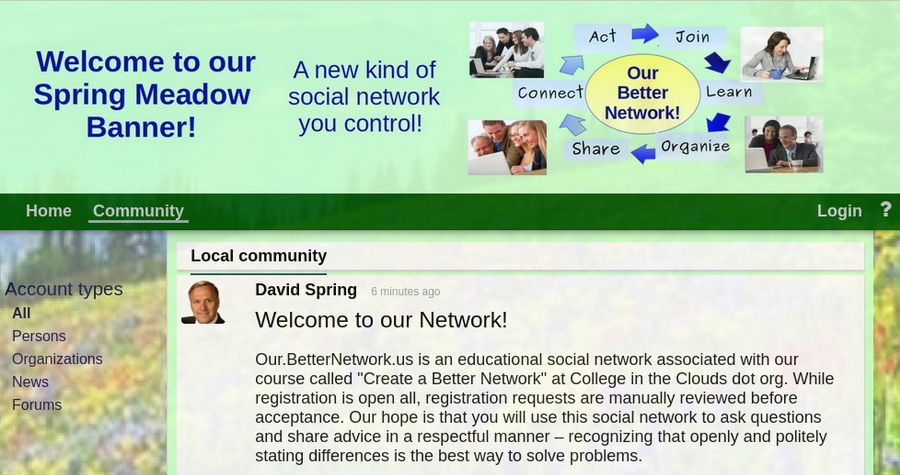
Log out to return to the Site Welcome page which still uses the Meadow theme. Click Community in the Welcome Menu. Note that the Community page shown to the public uses the style set by the admin rather than the style set by any member.
Step 9 Create a Network Cron Command
One of the most important things you should as an administrator of a new Freedica website is to set up a Cron Job (or Time related task) so that your server will properly update messages in your database.
Initially, if you only have a few members, these tasks can be done about every 10 minutes. If you have more than 50 members, you can easily increase the frequency to every 5 minutes. If you have more than 500 members, you can increase the frequency to every 1 minute. You only need to set up this process once. It will then run automatically in the background. Thankfully, the Hestia Control Panel can help us set up this cron job.
Open your Hestia Control Panel and go to your Network User account. Then click Cron. Then click Add Job. Change Run Command to every 10 (minutes).
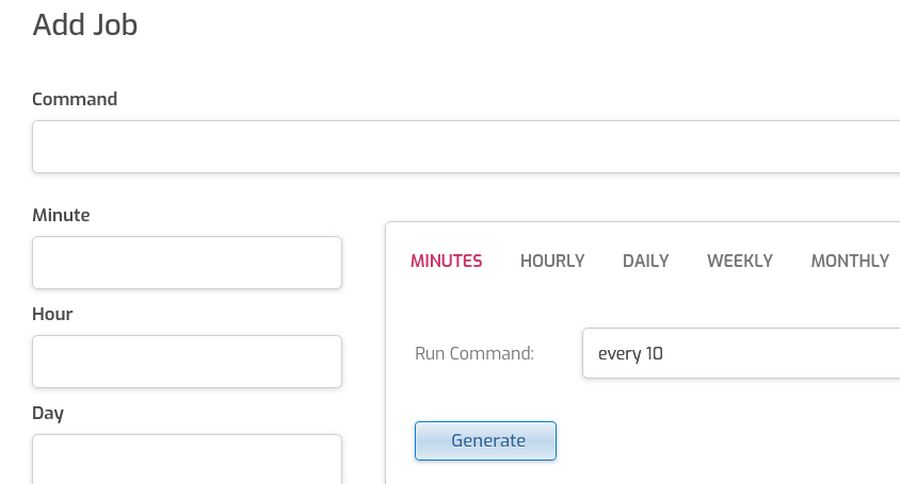
Then click Generate. Then copy paste the following into the command box:
cd /home/ctct16/web/our.betternetwork.us/public_html; /usr/bin/php bin/worker.php
Note: Change xxxxx with your Hestia User Name and change our.betternetwork.us with your network domain name.
Look closely to see that your Network Cron Command has four parts each separated by a space. The four parts are:
cd
/base/directory;
/path/to/php
bin/worker.php
The first part is the letters cd followed by a space. Cd means to change the directory (or folder) from the root directory to the base directory of your Freedica website.
The second part begins with a forward slash. The forward slash stands for your Linux root directory. The second part ends with a semi-colon. The semicolon symbol (;) is a way to put two or more commands on the same line and have them run in sequence. It is basically like pressing the ENTER key on your keyboard.
The third part of the cron command is called /path/to/php. This refers to the php folder which is located in your usr/bin folder.
The fourth part of the cron command is bin/worker.php. Translation: Go to your Freedica public_html folder and click on the bin folder. Then run the file called worker.php.
Copy the full path and the php path from the Freedica configuration file
We can use the Hestia File Manager to accurately determine and copy the full path and the php path. Log into your Hestia user account. Then click Files, web, your Freedica sub-domain, public_html.
Then click the config folder and click the local.config.php file to open it. This configuration file was created by Freedica during our installation process. Scroll down to line 32 to see the full base path. Using copy paste rather than typing will help us avoid any typing errors. Here is the base path to out demo network:
'basepath' => '/home/ctc16/web/our.betternetwork.us/public_html'
Then copy paste Line 24 which is the php path:
'php_path' => '/usr/bin/php',
Then close the Freedica configuration file and go back to the public_html folder. Click on the bin folder to see a file called worker.php.
We can now create our own Cron Command by typing cd followed by a space followed by our base path followed by a semi-colon and a space followed by the php path followed by a space followed by the worker file path:
cd /home/ctc16/web/our.betternetwork.us/public_html; /usr/bin/php bin/worker.php
Now that we have our Cron command, click Exit to Control Panel. Then click CRON. Then click Add Job. Then paste your command into the command box. Use Hestia to set the time for every 10 minutes. Then click Save and click Back. The cron job will be active and should run automatically. Then exit the Hestia Control Panel.
Step 10 Verify your Network Cron Job is working properly
Wait 20 minutes. Then log into your Freedica website as an administrator and see if the queue tasks have been completed. There should be no Messages in the Queue.
Congratulations! You now have a working Freedica Cron job!
What’s Next?
In our next article, we will review how to customize the appearance of your Freedica network log in page and Member pages.